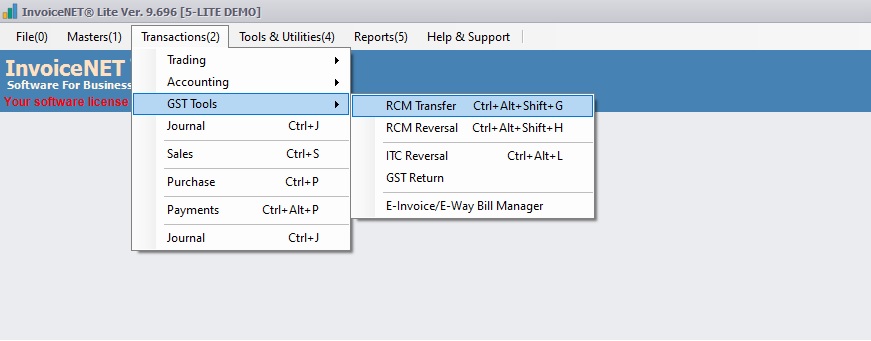
Transactions=>GST Tools=>RCM Transfer
Reverse Charge means the liability to pay tax is on the recipient of the supply of goods or services instead of the supplier of such goods or services in respect of notified categories of supply. Only certain types of business entities are subject to the reverse charge mechanism. Under the reverse charge mechanism, the recipient of goods or services becomes liable to pay the tax, i.e., the chargeability gets reversed.
For Example:-
In case of an unregistered person is selling goods or providing any services to the registered person, then the liability to pay tax shifts on the registered person i.e. the recipient of goods/services, where such supply is of taxable supplies. No reverse charge mechanism in the case of exempted supplies.
The tax will be paid by the registered dealer and all the provisions of the act will be applicable to him as if he is the supplier of the goods or services The concept behind this is to prevent tax evasion since it would be almost impossible to collect tax from the unregistered dealer. It would increase tax compliance and promotes transparency. Input credit will be allowed to the registered dealer for the tax paid by him under the reverse charge mechanism.
RCM Transfer Tool in InvoiceNET® Lite is a tool to handle RCM vouchers in an easy way. Using this, Users can view pending RCM transactions and can transfer RCM transfer entries by single or bulk.
Step 1
- Click Transactions=>GST Tools=>RCM Transfer to handle RCM transfers as shown in Step 1 figure
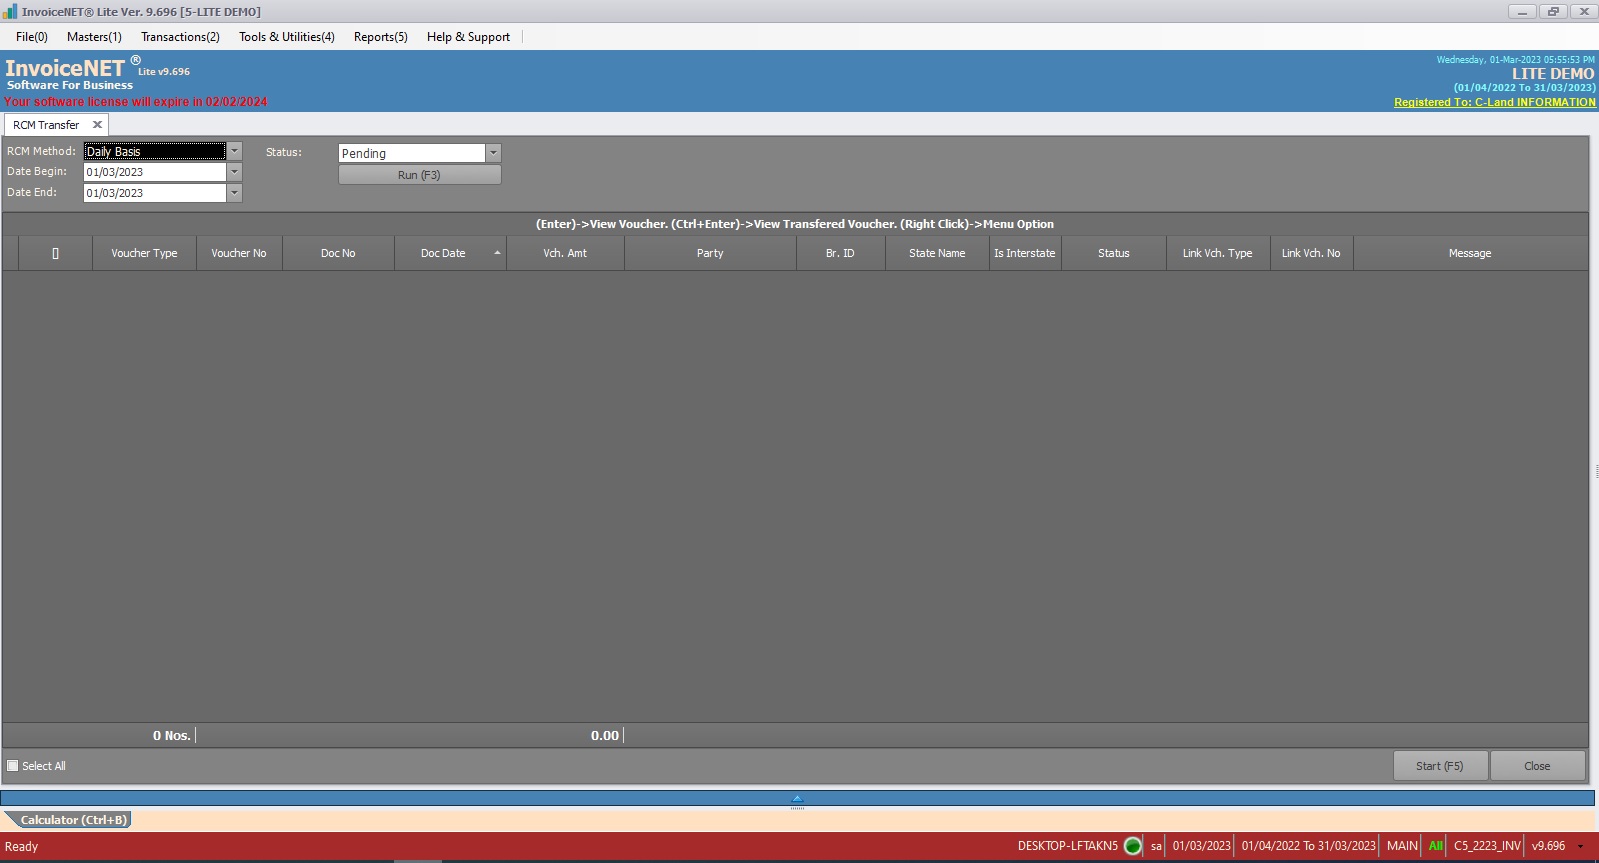
- Now RCM Transfer window appears as shown in Step 2 figure
Step 3
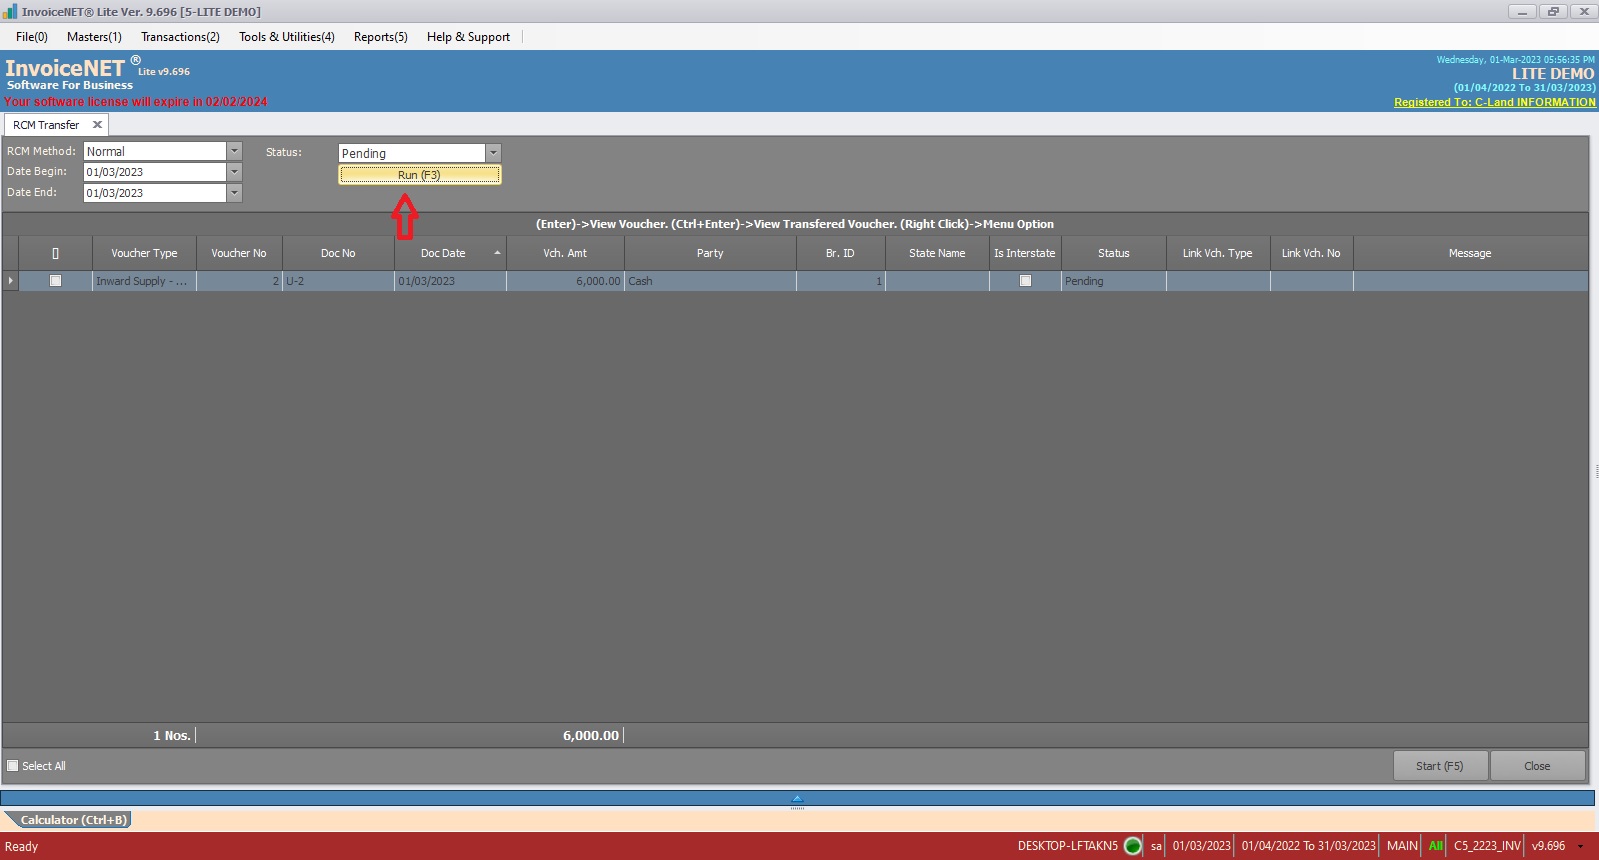
- In the header panel, there are 4 comb boxes available to select the RCM criteria.
- RCM Method=> RCM method to be searched. Available options are Normal / Daily Basis / Compulsory / Import Service / Not Applicable
- Date Begin=> Start Date of the period to search RCM vouchers
- Date End=> End Date of the period to search RCM vouchers
- Status=>Status of the RCM vouchers to be searched. Available status options are All / Pending / Posted
- After selecting the criteria, click on the Run button to apply the filter.
Step 4
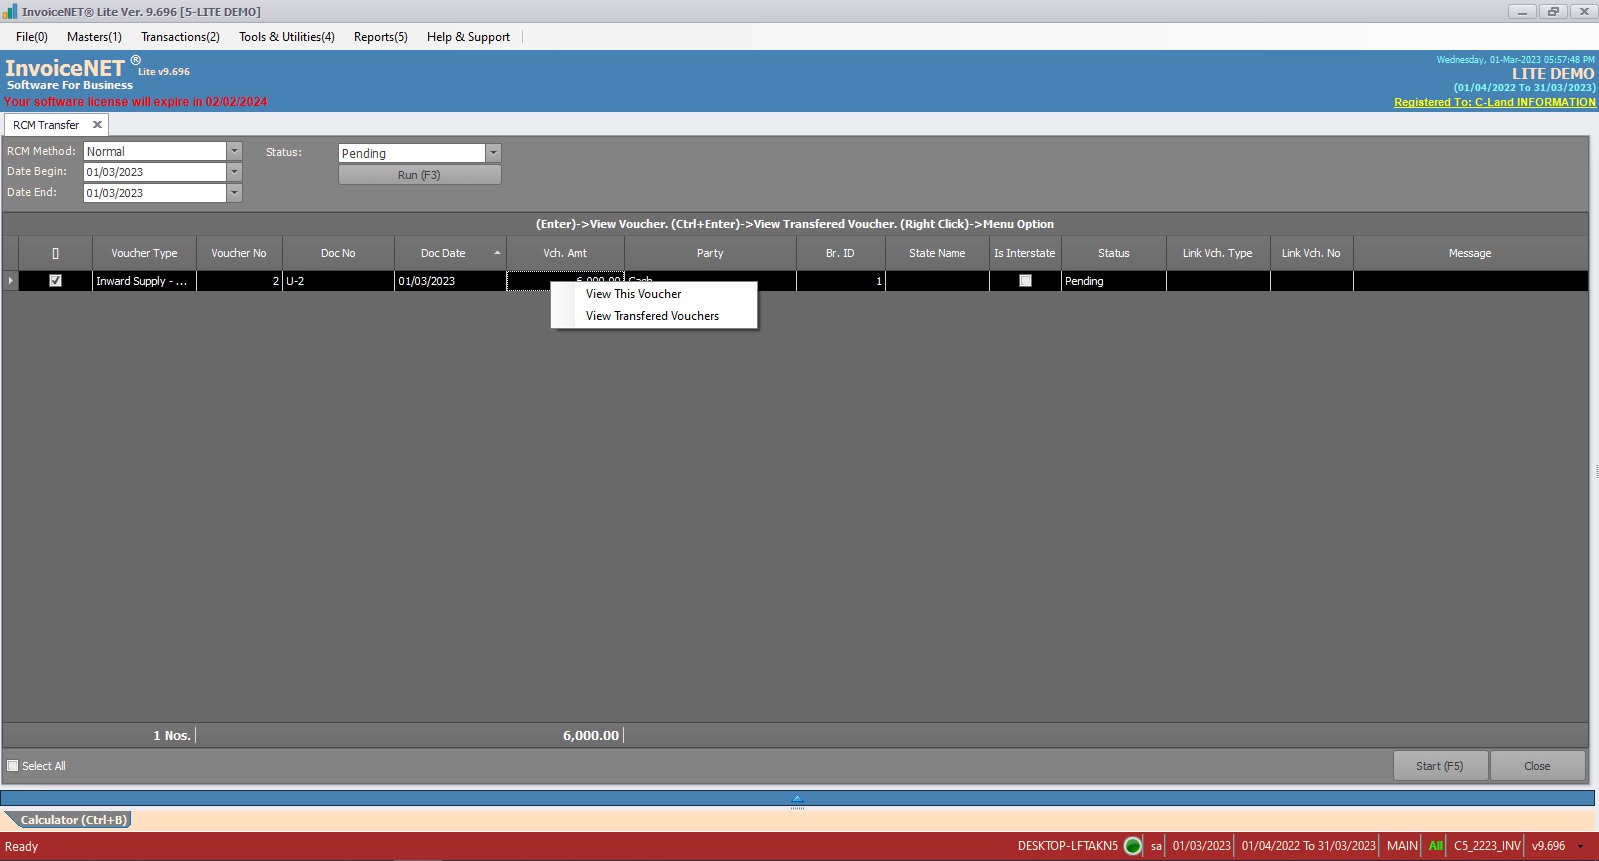
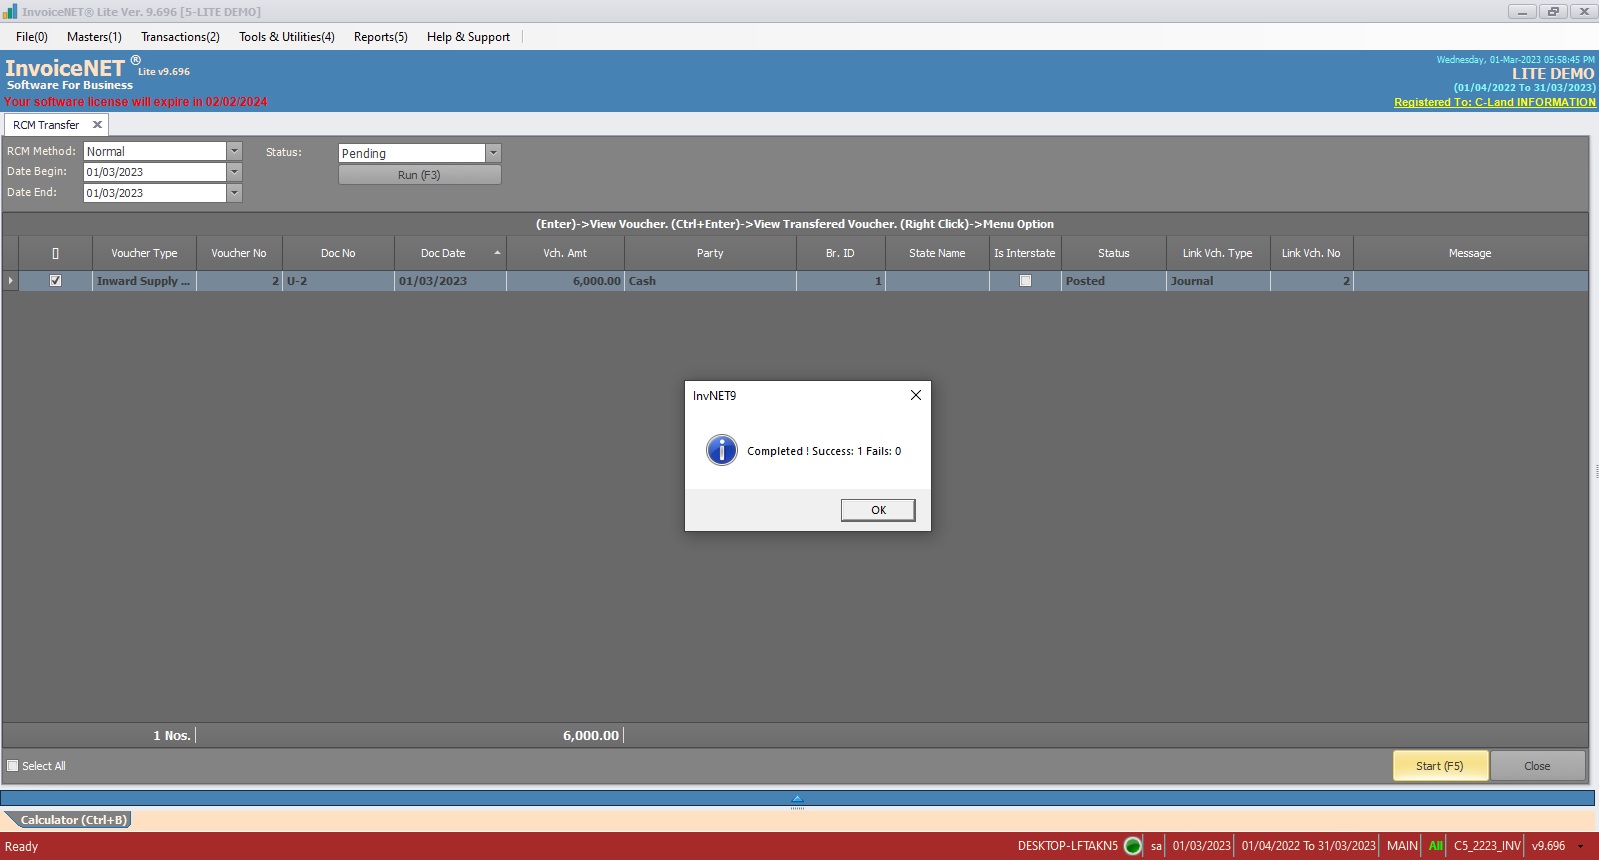
- As soon as the run button is clicked, RCM transfer transaction details will be displayed in the grid as shown in the Step 4 figure.
- User can view Voucher details / Transferred voucher details by right-clicking on a specific row in that grid
- To transfer RCM entry, select the check box located at the start of each row and then click on the start button. Multi-select can also be supported. To select all rows, put a tick on select all check box available at the bottom of the grid
- Once the start button is clicked, the tool will post RCM transfer journal entries for selected vouchers.
