InvoiceNET® V10 Installation Guidelines
This document outlines the installation process for InvoiceNET® V10
System Requirements:
- Processor: Core i3 or later
- RAM: 4 GB (Recommended 8 GB)
- Storage: 10–20 GB of free space for installation files and data
- Operating System: Windows 10 with the latest updates or later
versions
Prerequisites:
Before you begin the installation, ensure the following:
· InvoiceNET® V10 Application Setup:
This installer is used to install the application software. You will receive this
after purchasing InvoiceNET® V10 or registering for a demo.
· SQL Server Database Engine Setup:
This installer sets up the database engine to store your InvoiceNET data. You
can download the latest version of SQL Server from Microsoft at:
SQL Server Downloads
Installation Process:
The installation process consists of two main steps:
1. Installing the InvoiceNET® V10 Application:
- Extract the setup files to your PC
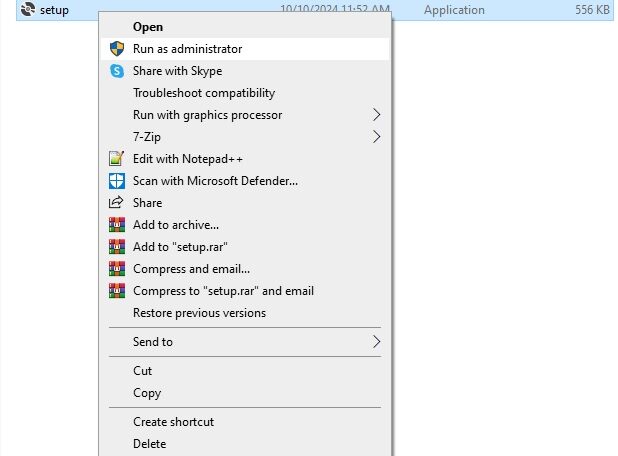
- Run the setup application file and click the Install button when prompted.
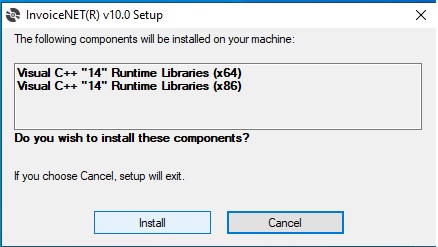
- The installation process will start by downloading and installing the necessary prerequisites (such as Visual C++).
- During the installation of prerequisites, your system may restart 1 or 2 times. After each restart, you may need to manually relaunch the setup application if it does not automatically resume.
- If prompted by any security confirmation dialogues, confirm to proceed.
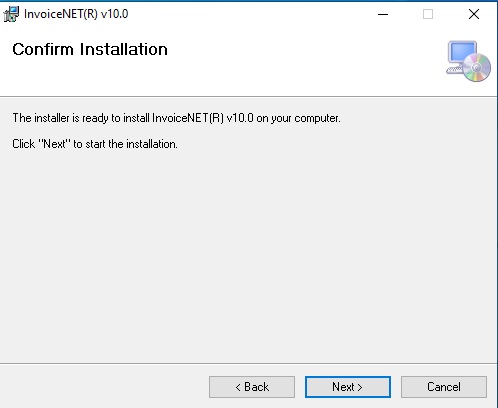
- Once the prerequisites are installed, the main InvoiceNET® V10 setup window will appear. Follow the on-screen instructions and choose the required options.
- You can change the application installation folder during this step if needed.
Note: If the prerequisites are already installed but the setup does not start automatically, you can manually start the application setup by running the InvoiceNET® Setup V10 file directly.


- After a successful installation, an InvoiceNET® V10 shortcut will appear on your desktop, and the application files will be located in the specified folder.
2. Installing the SQL Server Database Engine:
- Download and install the required licensed SQL Server Database Engine from the Microsoft website.
SQL Server 2017 Installation Guide - Follow the SQL Server installation guide to set up the database server.
- Use Mixed Mode Authentication and remember the default SQL admin password.
- Ensure the server collation is set to SQL_Latin1_General_CP1_CI_AS.
Collation Guide
- Ensure SQL Server is properly configured to store InvoiceNET® data.
If InvoiceNET® needs to be accessed from network PCs, enable TCP/IP protocol for the SQL Server instance and allow remote access to the port configured in the TCP/IP settings.
Guide to Enable Remote Access
Configuring InvoiceNET® after Installation:
- Launch InvoiceNET®: Click on the InvoiceNET® shortcut available on your desktop.

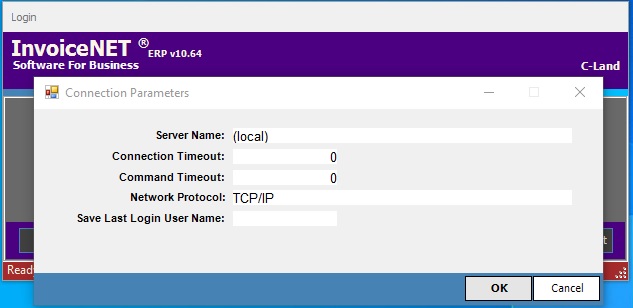
- Set Connection Parameters:
- On the login window, click on the Connection Parameters button.
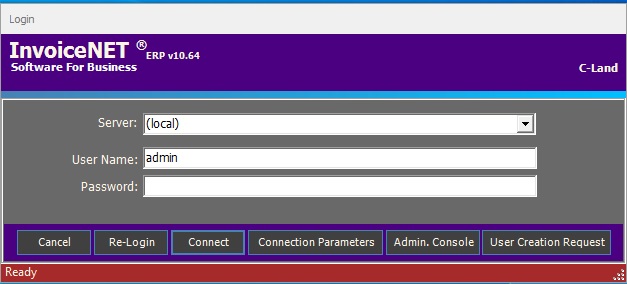
- In the Connection Parameters window, set the server name to point to the configured SQL instance.
- If you installed the default SQL instance, you can set the server name to the PC name of the server.
- If you installed a named SQL instance, set the server name as serverpcname\namedinstance.
- Save the settings by clicking OK.
- On the login window, click on the Connection Parameters button.
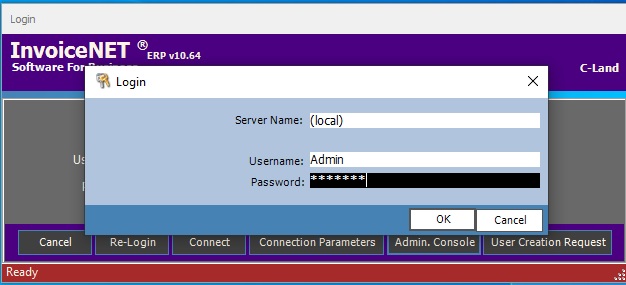
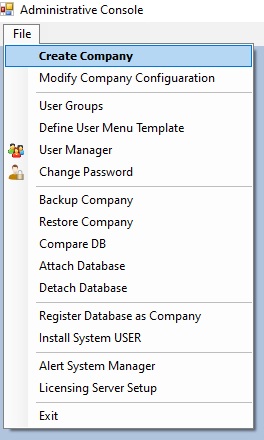
- Access Admin Console:
- Click on the Admin Console button on the login window.
- Enter the SQL admin password that was set during the SQL Server installation on the Admin Panel Login window.
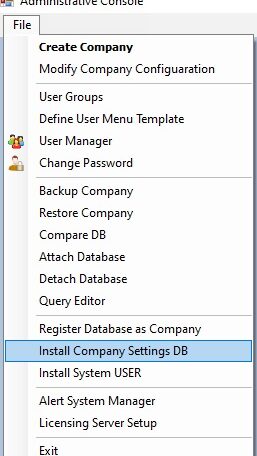
- First-Time Configuration: On the Admin Panel, configure the following:
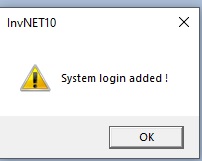
- Go to File -> Install System User: This will configure the default application user in the SQL Server database.

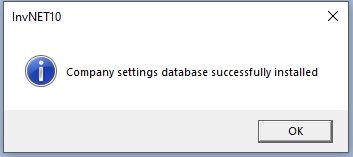
- Go to File -> Install Company Settings DB: This will attach the default database (Concern) to the SQL instance.
- Ensure that the InvoiceNET® installation folder has proper security settings, allowing the necessary access to the files.
- Go to File -> Install Company Settings DB: This will attach the default database (Concern) to the SQL instance.
- Go to File -> Install System User: This will configure the default application user in the SQL Server database.
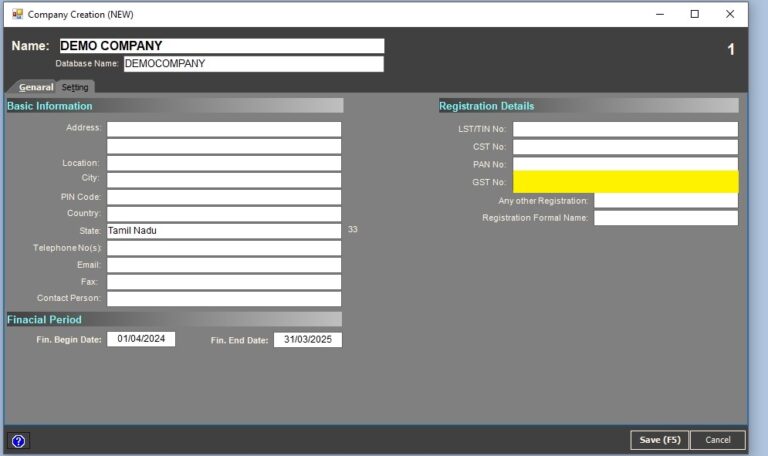
- Create New Company-Go to File -> New Company and create a new company in the application.
- Complete Configuration:
- After completing the above steps, close the Admin Console.
- Log in to InvoiceNET® and start using the application.