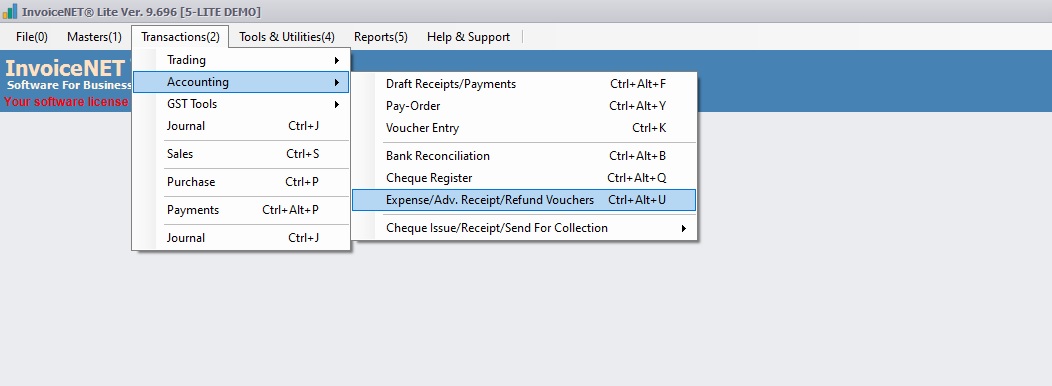
Transaction=>Accounting=>Expense/ Adv. Receipt/Refund Vouchers
- Advance Receipt
As per GST rules, advance receipts for supply of goods or services or both are liable to tax at the time of receipt of such advances even if original supply of goods or services or both is yet to be supply.The advance payments received from the customers may need to be reported in GSTR-1 along with GST Rates.The supplier has to issue a receipt voucher to the person paying in advance. The receipt voucher will contain details like the amount of advance, the rate of tax applicable, a description of goods or services, etc. The advance received should be grossed up. This means that the advance received is considered inclusive of GST. When the rate of tax cannot be determined during receipt of advance GST @ 18% has to be charged. Also if the point of sale cannot be ascertained the advance is considered as interstate supply and IGST has to be paid.
- Advance Refund
A bulk order is received by the manufacturer along with the advance of the order. The manufacturer would need to issue a receipt voucher at the time of receiving the advance.If the order is canceled anytime later than there will be no tax invoice issued and the manufacturer would need to issue a refund voucher for the advance received. In the case of an order for a service gets canceled after the payment of advance, then the service provider needs to issue a refund voucher to the person who made the payment.
- Expense Voucher
A business may have several expenses such as rent, telephone bills, Internet Bill, stationery, petty-cash expenses, and so on, to carry out the operations. These expenses attract GST.If you are a registered dealer and purchasing from another registered dealer, and paid GST at the time of payment or purchase, you are eligible to claim the Input Tax Credit for that expense.
- Refund Note Received
- Step 1
- Click Transactions=>Accounting=>Expense/Adv. Receipt/Refund Vouchers to create, modify or delete GST transactions as shown in Step 1 figure
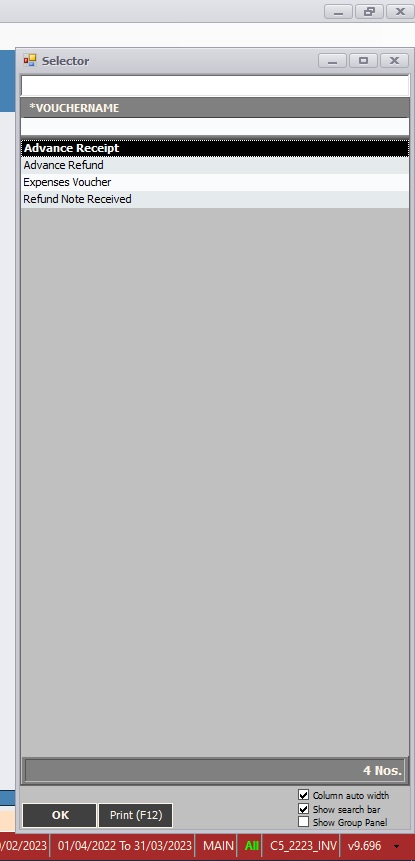
- Step 2
- Now List of sale vouchers selector window is displayed as shown in the Step 2 figure. Select a suitable transaction voucher type.
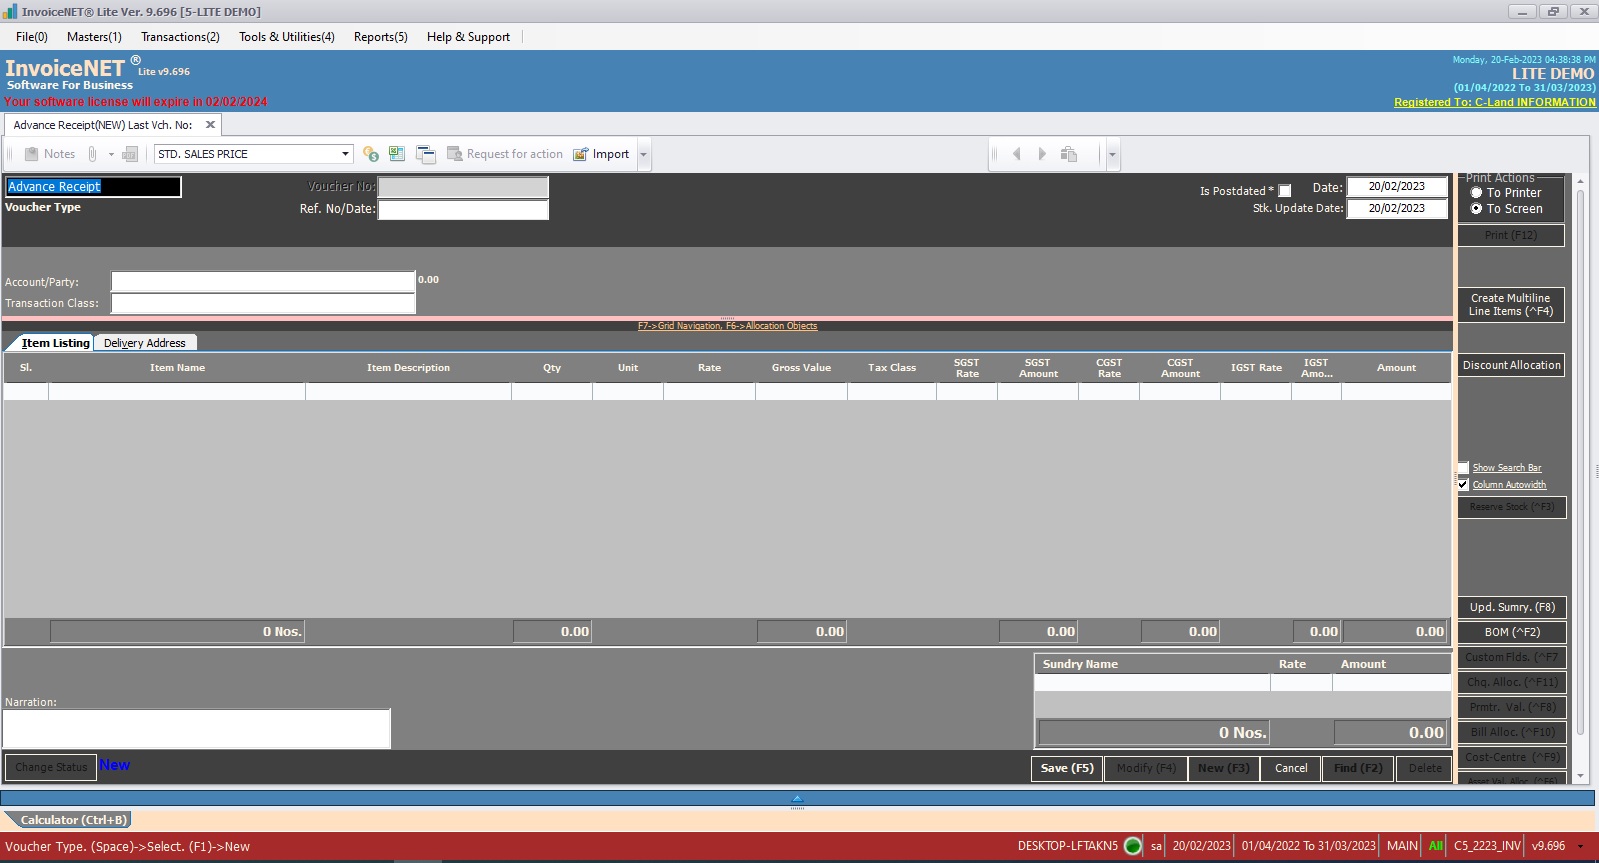
- Step 3
- Now transaction creation window appears as shown in Step 3 figure
- Step 4
- Users have to fill the text boxes as shown in Step 4 figure
- Voucher Type=>By default, this field displays the voucher type selected from the selection list
- Voucher No=>Voucher-No is the primary reference of any transaction. Voucher-No can be ‘Auto generated’ or ‘Manual’ as configured by the voucher manager. If it is ‘Auto’, Voucher No textbox shows __Pending__ until it is saved.
- Ref. No/Date:=>Reference Number is any alternate reference for a transaction apart from Voucher No.
- Date:=>Date stands for the date of transaction for accounting. The current date will automatically be displayed.
- Stk. Update Date:=>Stock update date stands for the date of transaction for inventory. The current date will automatically be displayed.
- Account/Party:=>The list of Ledgers selected by ‘Set Selection Group’ command button from the Voucher manager appears on pressing enter key from Transaction Account Party.
- Transaction Class=>The list of transaction classes selected by ‘Set Transaction Class’ command button from the Voucher manager appears on pressing enter key from Transaction Class Textbox.
- Item Listing=>The columns in product entry list can be configured by clicking Inventory Transactions Col. Properties command button in Voucher Manager. The columns with the visible property True will be displayed in Product Entry List. The possible columns are as follows.
- Item Name=>Name of item. Press space bar to select or press F1 to create new product.
- Qty=> Qty of the item
- Unit=> Unit name of the item. It is automatically filled from the item master
- Rate=>rate of per item
- Gross Value=>Qty * Rate
- Disc%=>Discount percentage if any
- Dis. Amount=>If Disc% is given, then the calculated discount amount is shown here
- Tax Class=>Tax class of the item. It is automatically filled from the item master
- SGST Rate=> If the transaction belongs to intra-state, the SGST rate is displayed here
- SGST Amount=> If the transaction belongs to intra-state, the SGST tax amount is displayed here
- CGST Rate=>If the transaction belongs to intra-state, the CGST rate is displayed here
- CGST Amount=>If the transaction belongs to intra-state, the CGST tax amount is displayed here
- IGST Rate=>If the transaction belongs to interstate, the IGST rate is displayed here
- IGST Amount=> If the transaction belongs to interstate, the IGST tax amount is displayed here
- Amount=>Value of items including tax
- Sundry List=>It consists of a list of sundries. Sundries can form as members of a Transaction Class in the Auto Sundry Definition section or they can be selected individually in a voucher.
- Sundry Name=> Select sundry name here
- Rate=> Rate of sundry
- Amount=> Amount of sundry
- Narration=>Description of the transaction. Standard Narration can be selected by pressing Ctrl+S
- Click on the Save button / press F5 to save the transaction
- Users have to fill the text boxes as shown in Step 4 figure
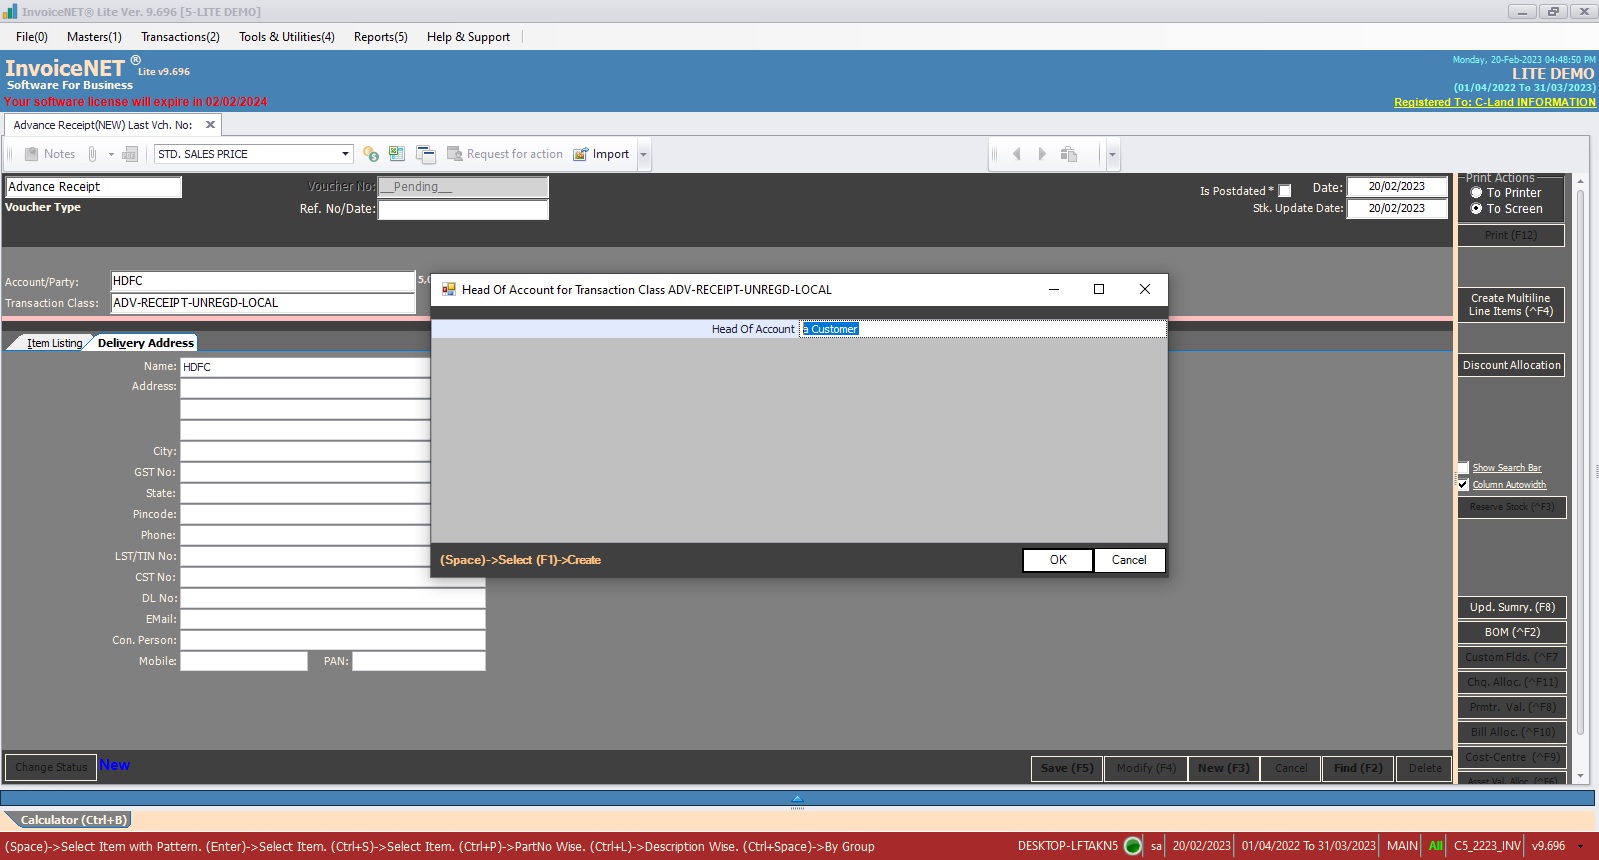
- Step 5
- As soon as the save button is clicked, the head of the account for the transaction window will appear as shown in step 5 figure. Select the appropriate ledger by pressing the space bar
- Step 6
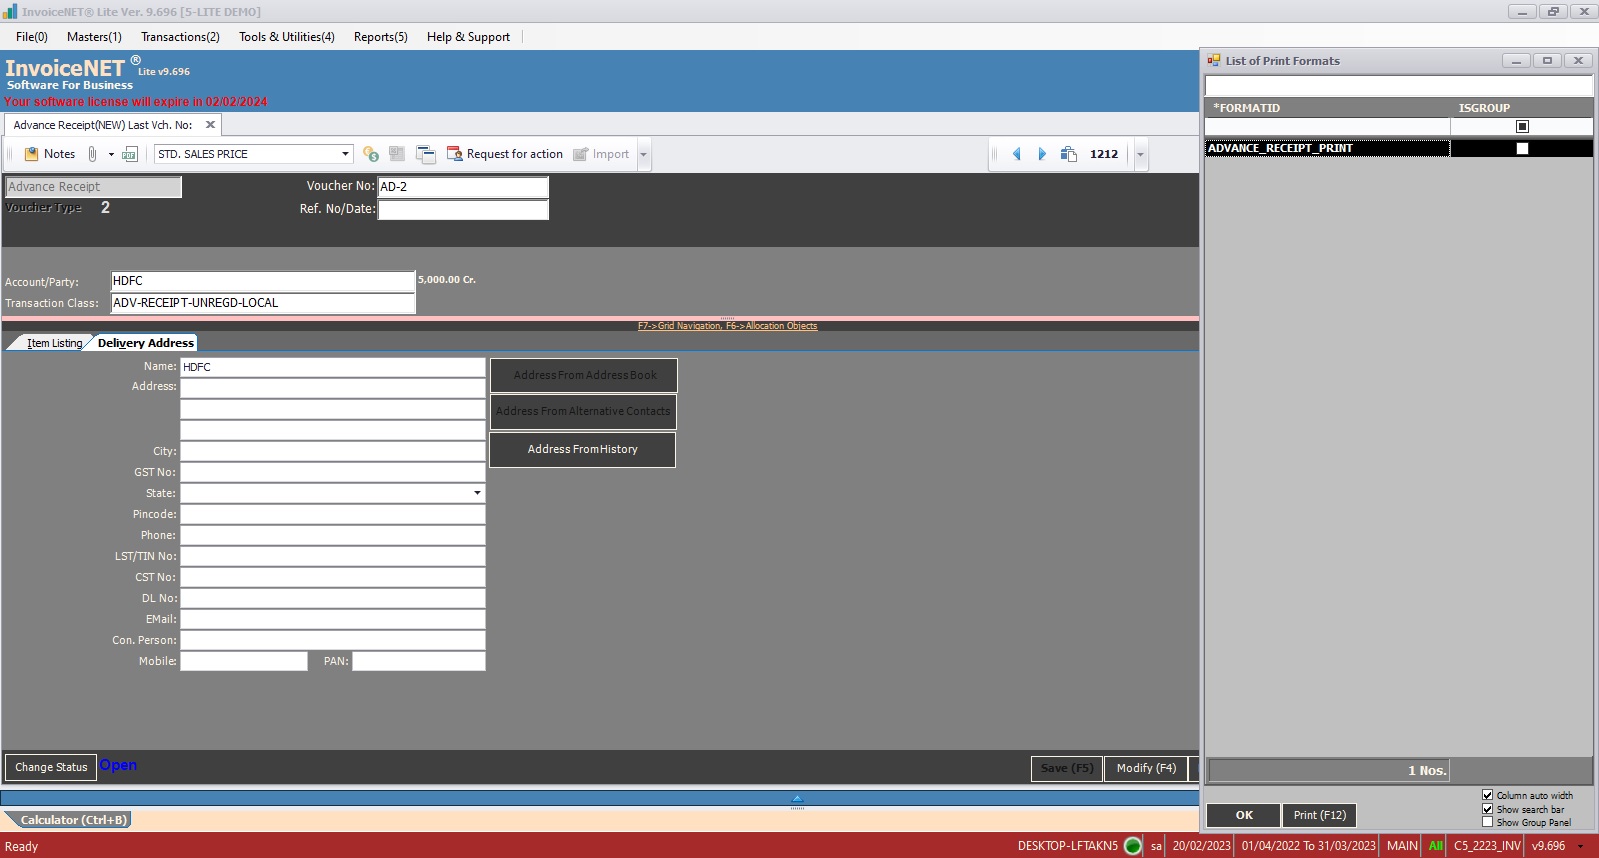
- After saving, the List of print formats window will appear. Select the print format and click on ok if you need to print. Otherwise, escape that window.